【凄過ぎ!】ChatGPT o3でThree.jsの3Dアニメーションを作成してみた
ここのところOpen AI発のChatGPTのアップデートが急速に行われていますね。最近ではo3モデルがリリースされて、AIが「自分で考える」ようになり、数学やプログラミングといった学問・科学の分野により強くなりました。
Web制作を行っている自分としてはThree.jsを使ったアニメーションの実装がより簡単にできると幅が広がるなと思っています。
Three.jsって1からやろうとすると結構難易度が高く、僕も毎度途中であきらめてしまうので。。
ということでThree.jsを触っていない人でもどこまでできるかというのを見ていきましょう。
アニメーションの実装例
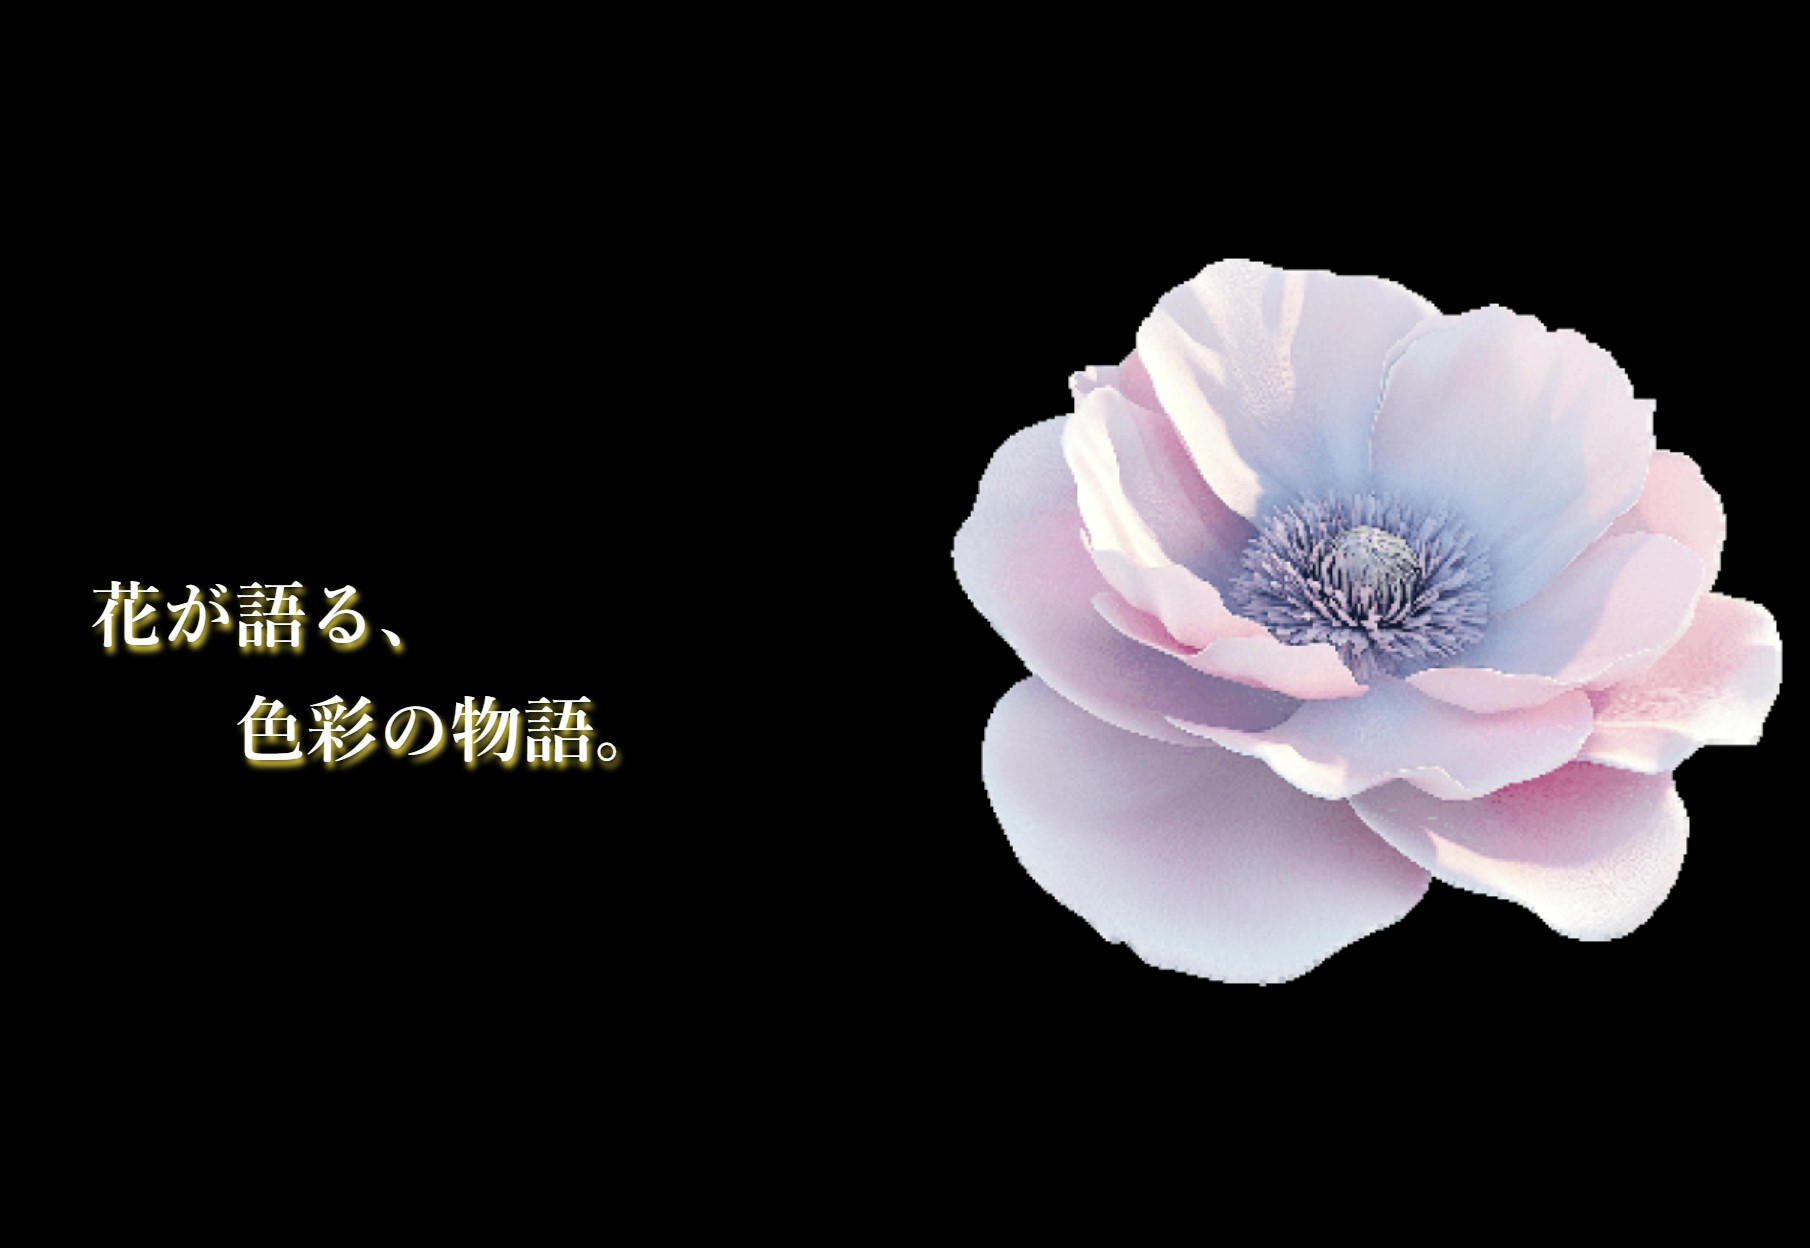
まず、完成品を先に見せますね。
「花のアート展」というテーマでウェブサイトのトップビューを作りました。多少の手修正はありますが、9割ほどはGPTに書いてもらっています。
ではやっていきましょう。
環境構築とアニメーションの概要を伝える
ここからChat GPTのモデルはo3-miniを使っていきます
ChatGPTに概要を伝えるプロンプトを投げます。
1 パーティクルをランダムに表示させる
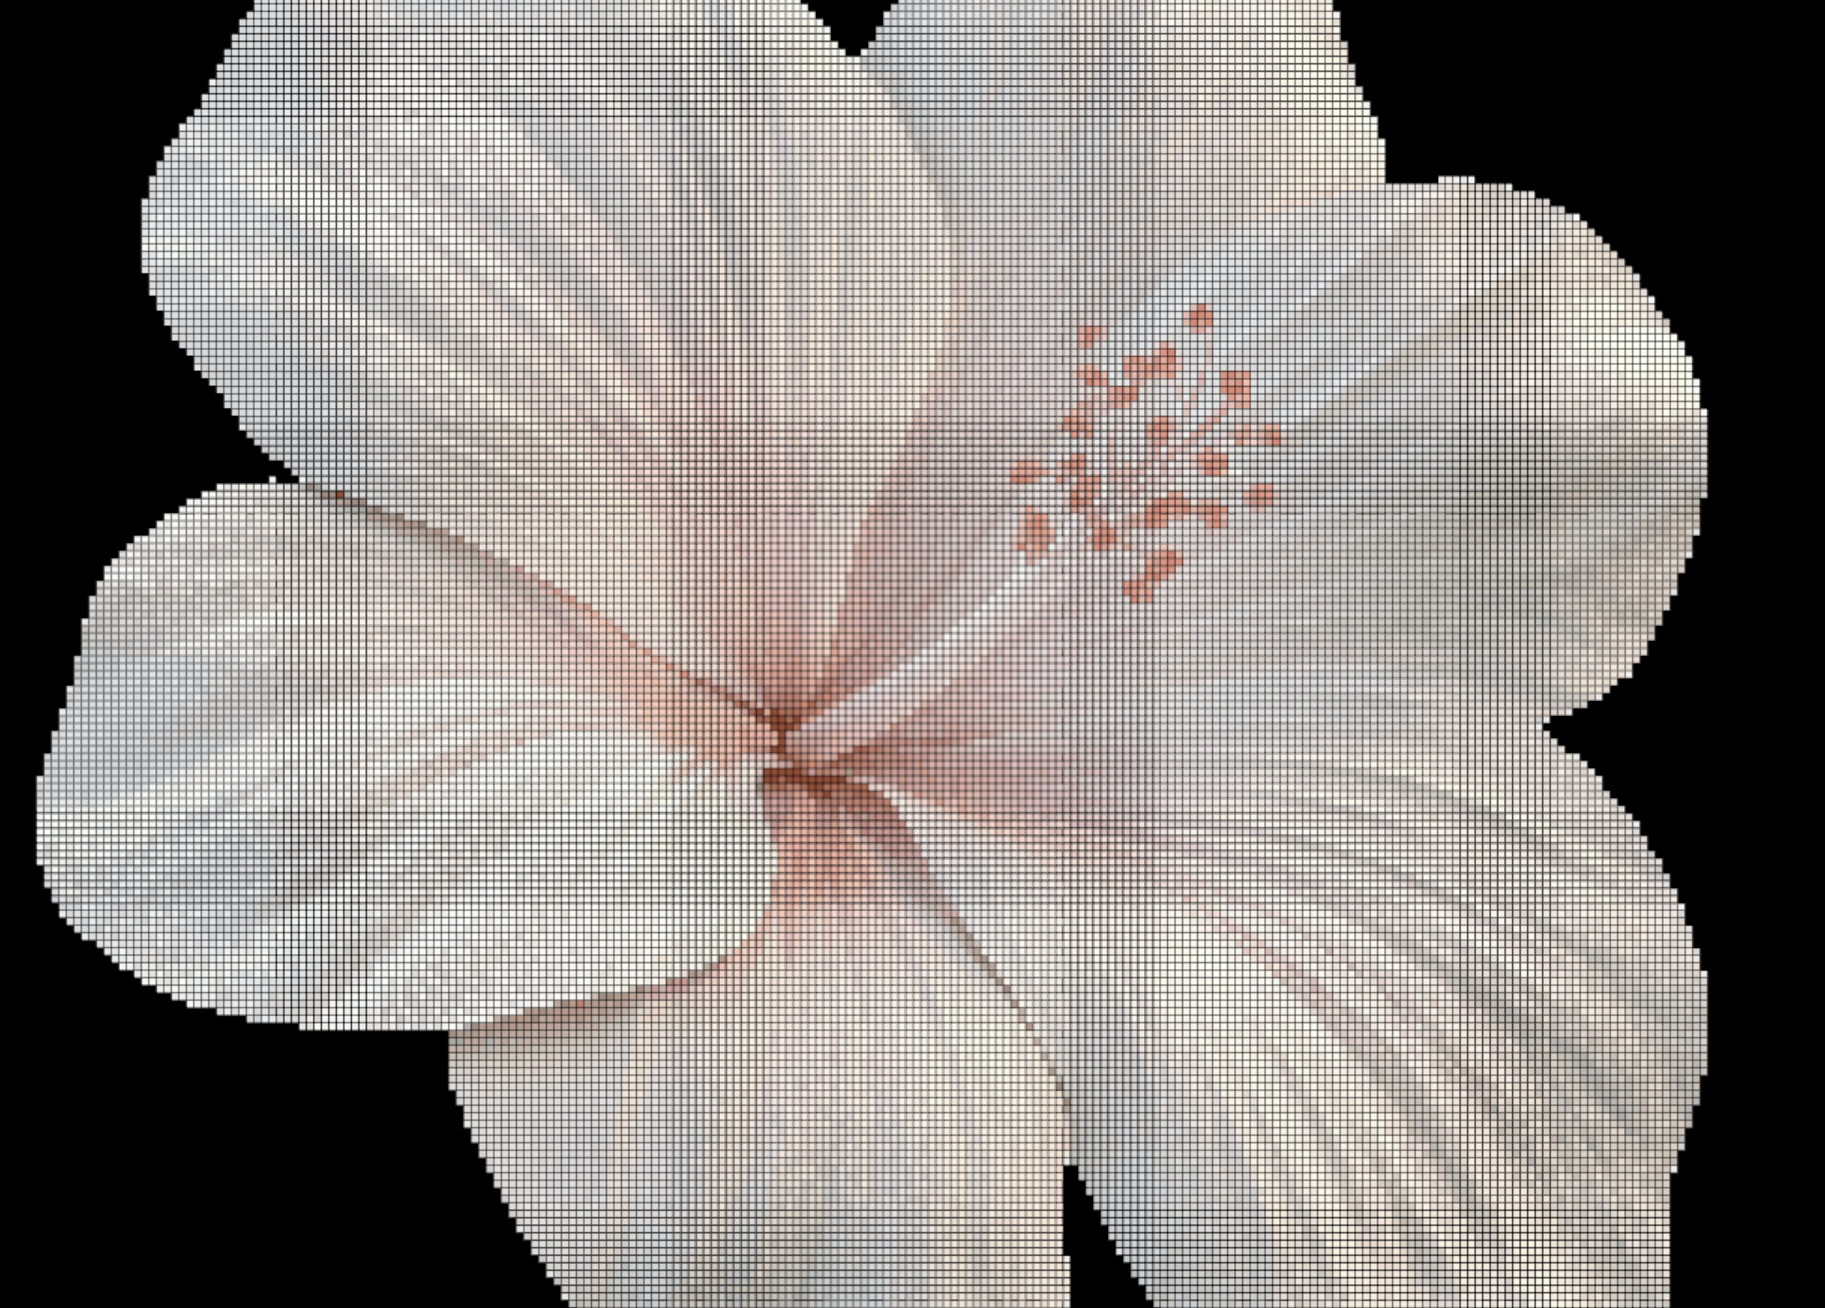
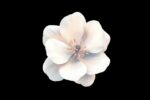
2 パーティクルが滑らかに集まってimage1.pngを形作る
回答のまとめです。
まず、環境構築するコマンドです。
npm create vite@latest my-particle-project --template vanilla-ts
cd my-particle-project
npm install
npm install three
次にindex.htmlの編集をします。
<!DOCTYPE html>
<html lang="ja">
  <head>
    <meta charset="UTF-8" />
    <meta name="viewport" content="width=device-width, initial-scale=1.0" />
    <title>Particle Image Animation</title>
    <style>
      body {
        margin: 0;
        overflow: hidden;
        background: #000;
      }
    </style>
  </head>
  <body>
    <!-- Vite はモジュールとして読み込みます -->
    <script type="module" src="/src/main.ts"></script>
  </body>
</html>
次にmain.tsを修正していきます。
import * as THREE from 'three';

// シーン、カメラ、レンダラーの初期化
const scene = new THREE.Scene();

const camera = new THREE.PerspectiveCamera(
  75,
  window.innerWidth / window.innerHeight,
  0.1,
  1000
);
camera.position.z = 200;

const renderer = new THREE.WebGLRenderer({ antialias: true });
renderer.setSize(window.innerWidth, window.innerHeight);
document.body.appendChild(renderer.domElement);

// image1.png のパス(publicフォルダ内なのでルートからのパスでOK)
const IMAGE_SRC = '/image1.png';

/**
 * 指定画像からターゲットとなるパーティクル座標を生成し、
 * 初期はランダムな位置に配置されたパーティクルが
 * 徐々に画像の形に集まるアニメーションを実装する関数
 */
function createParticleAnimation(imageSrc: string) {
  const img = new Image();
  img.src = imageSrc;
  img.onload = () => {
    // 画像サイズに合わせたオフスクリーンキャンバスを作成
    const canvas = document.createElement('canvas');
    const ctx = canvas.getContext('2d');
    if (!ctx) return;

    canvas.width = img.width;
    canvas.height = img.height;
    ctx.drawImage(img, 0, 0);

    // 画像のピクセルデータを取得
    const imgData = ctx.getImageData(0, 0, img.width, img.height);
    const data = imgData.data;
    const positionsArr: THREE.Vector3[] = [];
    const step = 4; // サンプリング間隔(値を小さくすると粒子数が増えます)

    // 画像の全ピクセルを走査し、アルファ値が一定以上のピクセルをターゲット座標とする
    for (let y = 0; y < img.height; y += step) {
      for (let x = 0; x < img.width; x += step) {
        const index = (x + y * img.width) * 4;
        const alpha = data[index + 3];
        if (alpha > 128) {
          // Three.js の座標系に合わせ、画像の中心を原点に配置
          const posX = x - img.width / 2;
          const posY = img.height / 2 - y; // y軸は反転
          positionsArr.push(new THREE.Vector3(posX, posY, 0));
        }
      }
    }

    const numParticles = positionsArr.length;
    const geometry = new THREE.BufferGeometry();

    // 現在のパーティクル座標(初期はランダム)
    const currentPositions = new Float32Array(numParticles * 3);
    // 画像から抽出したパーティクルのターゲット座標
    const targetPositions = new Float32Array(numParticles * 3);

    // ターゲット座標をセット
    for (let i = 0; i < numParticles; i++) {
      const pos = positionsArr[i];
      targetPositions[i * 3] = pos.x;
      targetPositions[i * 3 + 1] = pos.y;
      targetPositions[i * 3 + 2] = pos.z;
    }

    // 初期座標は画面全体にランダム配置(必要に応じて調整)
    for (let i = 0; i < numParticles; i++) {
      currentPositions[i * 3] = (Math.random() - 0.5) * window.innerWidth;
      currentPositions[i * 3 + 1] = (Math.random() - 0.5) * window.innerHeight;
      currentPositions[i * 3 + 2] = (Math.random() - 0.5) * 400; // Z方向もランダムに
    }

    geometry.setAttribute(
      'position',
      new THREE.BufferAttribute(currentPositions, 3)
    );

    // パーティクル用のマテリアル
    const material = new THREE.PointsMaterial({
      color: 0xffffff,
      size: 2,
    });

    const points = new THREE.Points(geometry, material);
    scene.add(points);

    // アニメーションループ
    function animate() {
      requestAnimationFrame(animate);
      const positionsAttribute = geometry.getAttribute(
        'position'
      ) as THREE.BufferAttribute;
      // 各パーティクルの座標をターゲットに向かって補間(lerp)で移動させる
      for (let i = 0; i < numParticles; i++) {
        const ix = i * 3;
        const iy = i * 3 + 1;
        const iz = i * 3 + 2;

        // 現在の座標
        const cx = currentPositions[ix];
        const cy = currentPositions[iy];
        const cz = currentPositions[iz];
        // ターゲット座標
        const tx = targetPositions[ix];
        const ty = targetPositions[iy];
        const tz = targetPositions[iz];

        const lerpFactor = 0.05; // 補間係数(値を大きくすると速く集まる)
        currentPositions[ix] += (tx - cx) * lerpFactor;
        currentPositions[iy] += (ty - cy) * lerpFactor;
        currentPositions[iz] += (tz - cz) * lerpFactor;
      }
      positionsAttribute.needsUpdate = true;
      renderer.render(scene, camera);
    }
    animate();
  };
}

createParticleAnimation(IMAGE_SRC);

// リサイズ対応
window.addEventListener('resize', () => {
  camera.aspect = window.innerWidth / window.innerHeight;
  camera.updateProjectionMatrix();
  renderer.setSize(window.innerWidth, window.innerHeight);
});
すると、パーティクルが広がって画面全体に整列するようなアニメーションが生成されました。
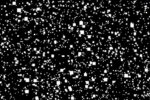

イメージと違うので修正していきます。
回答はこんな感じです。
import * as THREE from 'three';

// シーン、カメラ、レンダラーの初期化
const scene = new THREE.Scene();

const camera = new THREE.PerspectiveCamera(
  75,
  window.innerWidth / window.innerHeight,
  0.1,
  1000
);
camera.position.z = 200;

const renderer = new THREE.WebGLRenderer({ antialias: true });
renderer.setSize(window.innerWidth, window.innerHeight);
document.body.appendChild(renderer.domElement);

// publicフォルダ内の画像パス
const IMAGE_SRC = '/image1.png';

/**
 * 指定画像からターゲットとなるパーティクル座標を生成し、
 * 初期はランダムな位置に配置されたパーティクルが
 * 徐々に画像の形に集まるアニメーションを実装する関数
 */
function createParticleAnimation(imageSrc: string) {
  const img = new Image();
  img.src = imageSrc;
  img.onload = () => {
    // 画像サイズに合わせたオフスクリーンキャンバスを作成
    const canvas = document.createElement('canvas');
    const ctx = canvas.getContext('2d');
    if (!ctx) return;

    canvas.width = img.width;
    canvas.height = img.height;
    ctx.drawImage(img, 0, 0);

    // 画像のピクセルデータを取得
    const imgData = ctx.getImageData(0, 0, img.width, img.height);
    const data = imgData.data;
    const positionsArr: THREE.Vector3[] = [];
    const step = 4; // サンプリング間隔(値を小さくすると粒子数が増えます)

    // 画像の全ピクセルを走査し、アルファ値が一定以上のピクセルをターゲット座標とする
    for (let y = 0; y < img.height; y += step) {
      for (let x = 0; x < img.width; x += step) {
        const index = (x + y * img.width) * 4;
        const alpha = data[index + 3];
        if (alpha > 128) {
          // 画像の中心を原点に合わせる
          const posX = x - img.width / 2;
          const posY = img.height / 2 - y; // Y軸は反転
          positionsArr.push(new THREE.Vector3(posX, posY, 0));
        }
      }
    }

    // ★ここでスケーリングを適用★
    // 画像のピクセルサイズに応じた倍率を設定(調整が必要な場合はこの値を変更してください)
    const imageScale = Math.min(window.innerWidth / img.width, window.innerHeight / img.height) * 0.5;
    positionsArr.forEach(pos => pos.multiplyScalar(imageScale));

    const numParticles = positionsArr.length;
    const geometry = new THREE.BufferGeometry();

    // 各パーティクルの現在の座標(初期はランダム)とターゲット座標を格納する配列
    const currentPositions = new Float32Array(numParticles * 3);
    const targetPositions = new Float32Array(numParticles * 3);

    // ターゲット座標をセット
    for (let i = 0; i < numParticles; i++) {
      const pos = positionsArr[i];
      targetPositions[i * 3] = pos.x;
      targetPositions[i * 3 + 1] = pos.y;
      targetPositions[i * 3 + 2] = pos.z;
    }

    // 初期座標は画面全体にランダム配置
    for (let i = 0; i < numParticles; i++) {
      currentPositions[i * 3] = (Math.random() - 0.5) * window.innerWidth;
      currentPositions[i * 3 + 1] = (Math.random() - 0.5) * window.innerHeight;
      currentPositions[i * 3 + 2] = (Math.random() - 0.5) * 400; // Z方向もランダムに
    }

    geometry.setAttribute(
      'position',
      new THREE.BufferAttribute(currentPositions, 3)
    );

    // パーティクル用のマテリアル
    const material = new THREE.PointsMaterial({
      color: 0xffffff,
      size: 2,
    });

    const points = new THREE.Points(geometry, material);
    scene.add(points);

    // アニメーションループ
    function animate() {
      requestAnimationFrame(animate);
      const positionsAttribute = geometry.getAttribute(
        'position'
      ) as THREE.BufferAttribute;
      // 各パーティクルをターゲット座標に向かって線形補間(lerp)で移動
      for (let i = 0; i < numParticles; i++) {
        const ix = i * 3;
        const iy = i * 3 + 1;
        const iz = i * 3 + 2;

        const cx = currentPositions[ix];
        const cy = currentPositions[iy];
        const cz = currentPositions[iz];
        const tx = targetPositions[ix];
        const ty = targetPositions[iy];
        const tz = targetPositions[iz];

        const lerpFactor = 0.05; // 補間係数(値を大きくすると速く集まる)
        currentPositions[ix] += (tx - cx) * lerpFactor;
        currentPositions[iy] += (ty - cy) * lerpFactor;
        currentPositions[iz] += (tz - cz) * lerpFactor;
      }
      positionsAttribute.needsUpdate = true;
      renderer.render(scene, camera);
    }
    animate();
  };
}

createParticleAnimation(IMAGE_SRC);

// リサイズ対応
window.addEventListener('resize', () => {
  camera.aspect = window.innerWidth / window.innerHeight;
  camera.updateProjectionMatrix();
  renderer.setSize(window.innerWidth, window.innerHeight);
});
これでできたアニメーションがこちらです。
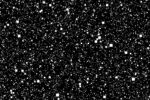
画像の花の形になるようにパーティクルが集まってきましたが、白黒だったり大きすぎたりするのでブラッシュアップしていきます。
色を付けたり、コードを修正しやすくする
回答はこんな感じです。
import * as THREE from 'three';

// シーン、カメラ、レンダラーの初期化
const scene = new THREE.Scene();

const camera = new THREE.PerspectiveCamera(
  75,
  window.innerWidth / window.innerHeight,
  0.1,
  1000
);
camera.position.z = 200;

const renderer = new THREE.WebGLRenderer({ antialias: true });
renderer.setSize(window.innerWidth, window.innerHeight);
document.body.appendChild(renderer.domElement);

// publicフォルダ内の画像パス
const IMAGE_SRC = '/image1.png';

/**
 * 指定画像からターゲットとなるパーティクル座標と色情報を生成し、
 * 初期はランダムな位置に配置されたパーティクルが
 * 徐々に画像の形(かつカラー)に集まるアニメーションを実装する関数
 */
function createParticleAnimation(imageSrc: string) {
  const img = new Image();
  img.src = imageSrc;
  img.onload = () => {
    // オフスクリーンキャンバスに画像を描画し、ピクセル情報を取得
    const canvas = document.createElement('canvas');
    const ctx = canvas.getContext('2d');
    if (!ctx) return;

    canvas.width = img.width;
    canvas.height = img.height;
    ctx.drawImage(img, 0, 0);
    const imgData = ctx.getImageData(0, 0, img.width, img.height);
    const data = imgData.data;

    // 画像のピクセル位置と色情報を保持する配列
    const positionsArr: THREE.Vector3[] = [];
    const colorsArr: THREE.Color[] = [];
    const step = 4; // サンプリング間隔(値を小さくするとパーティクル数が増えます)

    // 画像内の全ピクセルを走査(アルファ値が一定以上のものを採用)
    for (let y = 0; y < img.height; y += step) {
      for (let x = 0; x < img.width; x += step) {
        const index = (x + y * img.width) * 4;
        const alpha = data[index + 3];
        if (alpha > 128) {
          // 画像の中心を原点に合わせた座標に変換
          const posX = x - img.width / 2;
          const posY = img.height / 2 - y; // Y軸は反転
          positionsArr.push(new THREE.Vector3(posX, posY, 0));

          // ピクセルのRGB値(0~1に正規化)
          const r = data[index] / 255;
          const g = data[index + 1] / 255;
          const b = data[index + 2] / 255;
          colorsArr.push(new THREE.Color(r, g, b));
        }
      }
    }

    // ★ここでスケーリングを適用★
    // ウィンドウサイズに合わせた倍率で縮小(調整が必要な場合はこの値を変更してください)
    const imageScale = Math.min(window.innerWidth / img.width, window.innerHeight / img.height) * 0.5;
    positionsArr.forEach(pos => pos.multiplyScalar(imageScale));

    const numParticles = positionsArr.length;

    // 各パーティクルの現在の座標(初期はランダム)、目標座標、及び色情報を格納する配列を作成
    const currentPositions = new Float32Array(numParticles * 3);
    const targetPositions = new Float32Array(numParticles * 3);
    const colors = new Float32Array(numParticles * 3);

    // ターゲット座標と色情報をセット
    for (let i = 0; i < numParticles; i++) {
      const pos = positionsArr[i];
      targetPositions[i * 3] = pos.x;
      targetPositions[i * 3 + 1] = pos.y;
      targetPositions[i * 3 + 2] = pos.z;

      const col = colorsArr[i];
      colors[i * 3] = col.r;
      colors[i * 3 + 1] = col.g;
      colors[i * 3 + 2] = col.b;
    }

    // 初期座標は画面全体にランダム配置
    for (let i = 0; i < numParticles; i++) {
      currentPositions[i * 3] = (Math.random() - 0.5) * window.innerWidth;
      currentPositions[i * 3 + 1] = (Math.random() - 0.5) * window.innerHeight;
      currentPositions[i * 3 + 2] = (Math.random() - 0.5) * 400; // Z方向もランダムに
    }

    // BufferGeometryに位置属性とカラー属性を追加
    const geometry = new THREE.BufferGeometry();
    geometry.setAttribute('position', new THREE.BufferAttribute(currentPositions, 3));
    geometry.setAttribute('color', new THREE.BufferAttribute(colors, 3));

    // PointsMaterialにvertexColorsを有効化
    const material = new THREE.PointsMaterial({
      size: 2,
      vertexColors: true
    });

    const points = new THREE.Points(geometry, material);
    scene.add(points);

    // アニメーションループ
    function animate() {
      requestAnimationFrame(animate);
      const positionsAttribute = geometry.getAttribute('position') as THREE.BufferAttribute;
      // 各パーティクルの座標をターゲットに向かって線形補間(lerp)で移動
      for (let i = 0; i < numParticles; i++) {
        const ix = i * 3;
        const iy = i * 3 + 1;
        const iz = i * 3 + 2;

        const cx = currentPositions[ix];
        const cy = currentPositions[iy];
        const cz = currentPositions[iz];
        const tx = targetPositions[ix];
        const ty = targetPositions[iy];
        const tz = targetPositions[iz];

        const lerpFactor = 0.05; // 補間係数(値を大きくすると速く集まる)
        currentPositions[ix] += (tx - cx) * lerpFactor;
        currentPositions[iy] += (ty - cy) * lerpFactor;
        currentPositions[iz] += (tz - cz) * lerpFactor;
      }
      positionsAttribute.needsUpdate = true;
      renderer.render(scene, camera);
    }
    animate();
  };
}

createParticleAnimation(IMAGE_SRC);

// リサイズ対応
window.addEventListener('resize', () => {
  camera.aspect = window.innerWidth / window.innerHeight;
  camera.updateProjectionMatrix();
  renderer.setSize(window.innerWidth, window.innerHeight);
});
これで色が付き画像の通りの花が形作られてました。
まだ大きさや調整できていなかったり、粗さが出ているので修正していきます。
今後、微調整が必要になってくることが想定されるので、パラメーターで操作できるようにコードを修正してもらいます。
import * as THREE from 'three';

/*========================================
  設定パラメーター(必要に応じて値を変更してください)
========================================*/
const CONFIG = {
  // カメラ設定
  CAMERA_FOV: 75,
  CAMERA_NEAR: 0.1,
  CAMERA_FAR: 1000,
  CAMERA_Z: 200,

  // パーティクル設定
  PARTICLE_SIZE: 2,              // パーティクルのサイズ
  SAMPLE_STEP: 4,                // 画像からサンプリングする間隔(値を小さくすると粒子数が増えます)
  LERP_FACTOR: 0.05,             // 補間係数(大きいほど速く移動します)
  INITIAL_RANDOM_RANGE_X: window.innerWidth,  // 初期ランダム配置時のX方向の広がり
  INITIAL_RANDOM_RANGE_Y: window.innerHeight, // 初期ランダム配置時のY方向の広がり
  INITIAL_RANDOM_RANGE_Z: 400,    // 初期ランダム配置時のZ方向の広がり

  // 画像関連
  IMAGE_SCALE_FACTOR: 0.5,       // 画像のピクセル座標に掛ける倍率(値を変更するとパーティクルの最終位置が拡大縮小されます)
  ALPHA_THRESHOLD: 128,          // 画像のアルファ値の閾値(この値以上のピクセルをパーティクル化します)
};

// publicフォルダ内の画像パス
const IMAGE_SRC = '/image1.png';

/*========================================
  シーン、カメラ、レンダラーの初期化
========================================*/
const scene = new THREE.Scene();

const camera = new THREE.PerspectiveCamera(
  CONFIG.CAMERA_FOV,
  window.innerWidth / window.innerHeight,
  CONFIG.CAMERA_NEAR,
  CONFIG.CAMERA_FAR
);
camera.position.z = CONFIG.CAMERA_Z;

const renderer = new THREE.WebGLRenderer({ antialias: true });
renderer.setSize(window.innerWidth, window.innerHeight);
document.body.appendChild(renderer.domElement);

/*========================================
  パーティクルアニメーションの生成
========================================*/
function createParticleAnimation(imageSrc: string) {
  const img = new Image();
  img.src = imageSrc;
  img.onload = () => {
    // オフスクリーンキャンバスに画像を描画してピクセル情報を取得
    const canvas = document.createElement('canvas');
    const ctx = canvas.getContext('2d');
    if (!ctx) return;

    canvas.width = img.width;
    canvas.height = img.height;
    ctx.drawImage(img, 0, 0);
    const imgData = ctx.getImageData(0, 0, img.width, img.height);
    const data = imgData.data;

    // 画像のピクセル位置と色情報を保持する配列
    const positionsArr: THREE.Vector3[] = [];
    const colorsArr: THREE.Color[] = [];

    // 画像内の全ピクセルを走査(ALPHA_THRESHOLD以上のピクセルを採用)
    for (let y = 0; y < img.height; y += CONFIG.SAMPLE_STEP) {
      for (let x = 0; x < img.width; x += CONFIG.SAMPLE_STEP) {
        const index = (x + y * img.width) * 4;
        const alpha = data[index + 3];
        if (alpha > CONFIG.ALPHA_THRESHOLD) {
          // 画像の中心を原点に合わせた座標に変換
          const posX = x - img.width / 2;
          const posY = img.height / 2 - y; // Y軸は反転
          positionsArr.push(new THREE.Vector3(posX, posY, 0));

          // ピクセルのRGB値(0~1に正規化)
          const r = data[index] / 255;
          const g = data[index + 1] / 255;
          const b = data[index + 2] / 255;
          colorsArr.push(new THREE.Color(r, g, b));
        }
      }
    }

    // 画像のピクセル座標にスケーリングを適用
    const imageScale = Math.min(window.innerWidth / img.width, window.innerHeight / img.height) * CONFIG.IMAGE_SCALE_FACTOR;
    positionsArr.forEach(pos => pos.multiplyScalar(imageScale));

    const numParticles = positionsArr.length;
    const currentPositions = new Float32Array(numParticles * 3);
    const targetPositions = new Float32Array(numParticles * 3);
    const colors = new Float32Array(numParticles * 3);

    // ターゲット座標と色情報のセット
    for (let i = 0; i < numParticles; i++) {
      const pos = positionsArr[i];
      targetPositions[i * 3] = pos.x;
      targetPositions[i * 3 + 1] = pos.y;
      targetPositions[i * 3 + 2] = pos.z;

      const col = colorsArr[i];
      colors[i * 3] = col.r;
      colors[i * 3 + 1] = col.g;
      colors[i * 3 + 2] = col.b;
    }

    // 初期座標は画面全体にランダム配置
    for (let i = 0; i < numParticles; i++) {
      currentPositions[i * 3] = (Math.random() - 0.5) * CONFIG.INITIAL_RANDOM_RANGE_X;
      currentPositions[i * 3 + 1] = (Math.random() - 0.5) * CONFIG.INITIAL_RANDOM_RANGE_Y;
      currentPositions[i * 3 + 2] = (Math.random() - 0.5) * CONFIG.INITIAL_RANDOM_RANGE_Z;
    }

    // BufferGeometryに位置属性とカラー属性を追加
    const geometry = new THREE.BufferGeometry();
    geometry.setAttribute('position', new THREE.BufferAttribute(currentPositions, 3));
    geometry.setAttribute('color', new THREE.BufferAttribute(colors, 3));

    // PointsMaterialにvertexColorsを有効化
    const material = new THREE.PointsMaterial({
      size: CONFIG.PARTICLE_SIZE,
      vertexColors: true,
    });

    const points = new THREE.Points(geometry, material);
    scene.add(points);

    // アニメーションループ
    function animate() {
      requestAnimationFrame(animate);
      const positionsAttribute = geometry.getAttribute('position') as THREE.BufferAttribute;
      // 各パーティクルの位置をターゲットに向けて補間移動
      for (let i = 0; i < numParticles; i++) {
        const ix = i * 3;
        const iy = i * 3 + 1;
        const iz = i * 3 + 2;

        const cx = currentPositions[ix];
        const cy = currentPositions[iy];
        const cz = currentPositions[iz];
        const tx = targetPositions[ix];
        const ty = targetPositions[iy];
        const tz = targetPositions[iz];

        currentPositions[ix] += (tx - cx) * CONFIG.LERP_FACTOR;
        currentPositions[iy] += (ty - cy) * CONFIG.LERP_FACTOR;
        currentPositions[iz] += (tz - cz) * CONFIG.LERP_FACTOR;
      }
      positionsAttribute.needsUpdate = true;
      renderer.render(scene, camera);
    }
    animate();
  };
}

createParticleAnimation(IMAGE_SRC);

/*========================================
  リサイズ対応
========================================*/
window.addEventListener('resize', () => {
  camera.aspect = window.innerWidth / window.innerHeight;
  camera.updateProjectionMatrix();
  renderer.setSize(window.innerWidth, window.innerHeight);
});
画像が生成されたら、再度パーティクルが散らばるアニメーションも作成してもらいましょう。
import * as THREE from 'three';

/*========================================
  設定パラメーター(必要に応じて値を変更してください)
========================================*/
const CONFIG = {
  // カメラ設定
  CAMERA_FOV: 75,
  CAMERA_NEAR: 0.1,
  CAMERA_FAR: 1000,
  CAMERA_Z: 200,

  // パーティクル設定
  PARTICLE_SIZE: 2,              // パーティクルのサイズ
  SAMPLE_STEP: 4,                // 画像からサンプリングする間隔(値を小さくすると粒子数が増えます)
  LERP_FACTOR: 0.05,             // 補間係数(大きいほど速く移動します)
  INITIAL_RANDOM_RANGE_X: window.innerWidth,  // 散らばり時のX方向の広がり
  INITIAL_RANDOM_RANGE_Y: window.innerHeight, // 散らばり時のY方向の広がり
  INITIAL_RANDOM_RANGE_Z: 400,    // 散らばり時のZ方向の広がり

  // 画像関連
  IMAGE_SCALE_FACTOR: 0.5,       // 画像のピクセル座標に掛ける倍率
  ALPHA_THRESHOLD: 128,          // 画像のアルファ値の閾値(この値以上のピクセルをパーティクル化します)

  // 状態切り替え設定
  TRANSITION_THRESHOLD: 1,       // すべてのパーティクルが目標に近いと判断する距離の閾値
  STATE_DELAY: 1000,             // 状態切り替えまでの待機時間(ミリ秒)
};

// publicフォルダ内の画像パス
const IMAGE_SRC = '/image1.png';

/*========================================
  シーン、カメラ、レンダラーの初期化
========================================*/
const scene = new THREE.Scene();

const camera = new THREE.PerspectiveCamera(
  CONFIG.CAMERA_FOV,
  window.innerWidth / window.innerHeight,
  CONFIG.CAMERA_NEAR,
  CONFIG.CAMERA_FAR
);
camera.position.z = CONFIG.CAMERA_Z;

const renderer = new THREE.WebGLRenderer({ antialias: true });
renderer.setSize(window.innerWidth, window.innerHeight);
document.body.appendChild(renderer.domElement);

/*========================================
  パーティクルアニメーションの生成
========================================*/
function createParticleAnimation(imageSrc: string) {
  const img = new Image();
  img.src = imageSrc;
  img.onload = () => {
    // オフスクリーンキャンバスに画像を描画してピクセル情報を取得
    const canvas = document.createElement('canvas');
    const ctx = canvas.getContext('2d');
    if (!ctx) return;
    canvas.width = img.width;
    canvas.height = img.height;
    ctx.drawImage(img, 0, 0);
    const imgData = ctx.getImageData(0, 0, img.width, img.height);
    const data = imgData.data;

    // 画像のピクセル位置と色情報を保持する配列
    const positionsArr: THREE.Vector3[] = [];
    const colorsArr: THREE.Color[] = [];
    for (let y = 0; y < img.height; y += CONFIG.SAMPLE_STEP) {
      for (let x = 0; x < img.width; x += CONFIG.SAMPLE_STEP) {
        const index = (x + y * img.width) * 4;
        const alpha = data[index + 3];
        if (alpha > CONFIG.ALPHA_THRESHOLD) {
          // 画像の中心を原点に合わせた座標に変換
          const posX = x - img.width / 2;
          const posY = img.height / 2 - y; // Y軸は反転
          positionsArr.push(new THREE.Vector3(posX, posY, 0));

          // RGB値を0~1に正規化して取得
          const r = data[index] / 255;
          const g = data[index + 1] / 255;
          const b = data[index + 2] / 255;
          colorsArr.push(new THREE.Color(r, g, b));
        }
      }
    }

    // 画像のピクセル座標にスケーリングを適用
    const imageScale = Math.min(window.innerWidth / img.width, window.innerHeight / img.height) * CONFIG.IMAGE_SCALE_FACTOR;
    positionsArr.forEach(pos => pos.multiplyScalar(imageScale));

    const numParticles = positionsArr.length;

    // imagePositions: 画像の形状となるターゲット座標
    const imagePositions = new Float32Array(numParticles * 3);
    for (let i = 0; i < numParticles; i++) {
      const pos = positionsArr[i];
      imagePositions[i * 3] = pos.x;
      imagePositions[i * 3 + 1] = pos.y;
      imagePositions[i * 3 + 2] = pos.z;
    }

    // scatterPositions: パーティクルが散らばる際のターゲット座標(ランダム)
    const scatterPositions = new Float32Array(numParticles * 3);
    for (let i = 0; i < numParticles; i++) {
      scatterPositions[i * 3] = (Math.random() - 0.5) * CONFIG.INITIAL_RANDOM_RANGE_X;
      scatterPositions[i * 3 + 1] = (Math.random() - 0.5) * CONFIG.INITIAL_RANDOM_RANGE_Y;
      scatterPositions[i * 3 + 2] = (Math.random() - 0.5) * CONFIG.INITIAL_RANDOM_RANGE_Z;
    }

    // colors: 各パーティクルの色情報
    const colors = new Float32Array(numParticles * 3);
    for (let i = 0; i < numParticles; i++) {
      const col = colorsArr[i];
      colors[i * 3] = col.r;
      colors[i * 3 + 1] = col.g;
      colors[i * 3 + 2] = col.b;
    }

    // 初期のパーティクル配置は scatterPositions(散らばった状態)から開始
    const currentPositions = new Float32Array(numParticles * 3);
    for (let i = 0; i < numParticles * 3; i++) {
      currentPositions[i] = scatterPositions[i];
    }

    // 初期状態は「集まる」状態(ターゲットが imagePositions)
    let currentTarget = imagePositions;
    let isGathering = true;
    let lastSwitchTime = Date.now();

    // BufferGeometry に位置属性とカラー属性を追加
    const geometry = new THREE.BufferGeometry();
    geometry.setAttribute('position', new THREE.BufferAttribute(currentPositions, 3));
    geometry.setAttribute('color', new THREE.BufferAttribute(colors, 3));

    const material = new THREE.PointsMaterial({
      size: CONFIG.PARTICLE_SIZE,
      vertexColors: true,
    });

    const points = new THREE.Points(geometry, material);
    scene.add(points);

    // アニメーションループ
    function animate() {
      requestAnimationFrame(animate);

      // 各パーティクルの位置を currentTarget に向けて補間移動
      for (let i = 0; i < numParticles; i++) {
        const ix = i * 3;
        currentPositions[ix] += (currentTarget[ix] - currentPositions[ix]) * CONFIG.LERP_FACTOR;
        currentPositions[ix + 1] += (currentTarget[ix + 1] - currentPositions[ix + 1]) * CONFIG.LERP_FACTOR;
        currentPositions[ix + 2] += (currentTarget[ix + 2] - currentPositions[ix + 2]) * CONFIG.LERP_FACTOR;
      }
      geometry.getAttribute('position').needsUpdate = true;

      // すべてのパーティクルが現在のターゲットに十分近いかを判定
      let maxDiff = 0;
      for (let i = 0; i < numParticles; i++) {
        const ix = i * 3;
        const dx = currentPositions[ix] - currentTarget[ix];
        const dy = currentPositions[ix + 1] - currentTarget[ix + 1];
        const dz = currentPositions[ix + 2] - currentTarget[ix + 2];
        const diff = Math.sqrt(dx * dx + dy * dy + dz * dz);
        if (diff > maxDiff) {
          maxDiff = diff;
        }
      }
      // 閾値以内に収まっていれば、一定時間後に状態を切り替える
      if (maxDiff < CONFIG.TRANSITION_THRESHOLD && (Date.now() - lastSwitchTime > CONFIG.STATE_DELAY)) {
        isGathering = !isGathering;
        // 集まる状態なら imagePositions、散らばる状態なら scatterPositions をターゲットに設定
        currentTarget = isGathering ? imagePositions : scatterPositions;
        lastSwitchTime = Date.now();
      }

      renderer.render(scene, camera);
    }
    animate();
  };
}

createParticleAnimation(IMAGE_SRC);

/*========================================
  リサイズ対応
========================================*/
window.addEventListener('resize', () => {
  camera.aspect = window.innerWidth / window.innerHeight;
  camera.updateProjectionMatrix();
  renderer.setSize(window.innerWidth, window.innerHeight);
});
大まかにはできていますが、アニメーションの切り替わりが早すぎるので一定時間おいてからアニメーションの移行が起きるようにしましょう。
これはパラメーターのSTATE_DELAY: 1000を変えればOKです。5000とかにしておきましょう。(コードは省略)
アニメーションのループ
これで単発アニメーションができたので、これをループさせ、画像の切り替えも行います。
import * as THREE from 'three';

/*========================================
  設定パラメーター(必要に応じて値を変更してください)
========================================*/
const CONFIG = {
  // カメラ設定
  CAMERA_FOV: 75,
  CAMERA_NEAR: 0.1,
  CAMERA_FAR: 1000,
  CAMERA_Z: 200,

  // パーティクル設定
  PARTICLE_SIZE: 2,              // パーティクルのサイズ
  SAMPLE_STEP: 4,                // 画像からサンプリングする間隔(小さいほど粒子数が増えます)
  LERP_FACTOR: 0.05,             // 補間係数(大きいほど速く移動)
  INITIAL_RANDOM_RANGE_X: window.innerWidth,  // 散らばる際のX方向の広がり
  INITIAL_RANDOM_RANGE_Y: window.innerHeight, // 散らばる際のY方向の広がり
  INITIAL_RANDOM_RANGE_Z: 400,    // 散らばる際のZ方向の広がり

  // 画像関連
  IMAGE_SCALE_FACTOR: 0.5,       // 画像のピクセル座標に掛ける倍率
  ALPHA_THRESHOLD: 128,          // 画像のアルファ値の閾値(この値以上のピクセルをパーティクル化)

  // 状態切り替え設定
  TRANSITION_THRESHOLD: 1,       // すべてのパーティクルが目標に近いと判断する閾値(各頂点の誤差)
  STATE_DELAY: 1000,             // 状態切り替えまでの待機時間(ミリ秒)
};

// 切り替える画像のパス(publicフォルダ内に配置してください)
const IMAGE_SOURCES = ['/image1.png', '/image2.png', '/image3.png'];
let currentImageIndex = 0;

/*========================================
  シーン、カメラ、レンダラーの初期化
========================================*/
const scene = new THREE.Scene();

const camera = new THREE.PerspectiveCamera(
  CONFIG.CAMERA_FOV,
  window.innerWidth / window.innerHeight,
  CONFIG.CAMERA_NEAR,
  CONFIG.CAMERA_FAR
);
camera.position.z = CONFIG.CAMERA_Z;

const renderer = new THREE.WebGLRenderer({ antialias: true });
renderer.setSize(window.innerWidth, window.innerHeight);
document.body.appendChild(renderer.domElement);

/*========================================
  グローバル変数(各画像ごとに再初期化される)
========================================*/
let currentGeometry: THREE.BufferGeometry;
let currentPoints: THREE.Points;
let currentPositions: Float32Array;
let currentTarget: Float32Array;
let scatterPositions: Float32Array;
let imagePositions: Float32Array;
let colors: Float32Array;
let numParticles = 0;

let isGathering = true;  // true: 画像の形に集まる状態、false: 散らばる状態
let lastSwitchTime = Date.now();

/*========================================
  画像を読み込み、パーティクルデータを生成する関数
========================================*/
function loadImage(index: number) {
  const img = new Image();
  img.src = IMAGE_SOURCES[index];
  img.onload = () => {
    // オフスクリーンキャンバスに描画してピクセル情報を取得
    const canvas = document.createElement('canvas');
    const ctx = canvas.getContext('2d');
    if (!ctx) return;
    canvas.width = img.width;
    canvas.height = img.height;
    ctx.drawImage(img, 0, 0);
    const imgData = ctx.getImageData(0, 0, img.width, img.height);
    const data = imgData.data;

    // 画像から対象とするピクセルの座標と色情報を抽出
    const positionsArr: THREE.Vector3[] = [];
    const colorsArr: THREE.Color[] = [];
    for (let y = 0; y < img.height; y += CONFIG.SAMPLE_STEP) {
      for (let x = 0; x < img.width; x += CONFIG.SAMPLE_STEP) {
        const index = (x + y * img.width) * 4;
        const alpha = data[index + 3];
        if (alpha > CONFIG.ALPHA_THRESHOLD) {
          // 画像の中心を原点に合わせた座標に変換
          const posX = x - img.width / 2;
          const posY = img.height / 2 - y; // Y軸は反転
          positionsArr.push(new THREE.Vector3(posX, posY, 0));

          // RGB値を0~1に正規化
          const r = data[index] / 255;
          const g = data[index + 1] / 255;
          const b = data[index + 2] / 255;
          colorsArr.push(new THREE.Color(r, g, b));
        }
      }
    }

    // 画像のピクセル座標にスケーリングを適用
    const imageScale = Math.min(window.innerWidth / img.width, window.innerHeight / img.height) * CONFIG.IMAGE_SCALE_FACTOR;
    positionsArr.forEach(pos => pos.multiplyScalar(imageScale));

    numParticles = positionsArr.length;
    // 画像の形状となるターゲット座標
    imagePositions = new Float32Array(numParticles * 3);
    for (let i = 0; i < numParticles; i++) {
      const pos = positionsArr[i];
      imagePositions[i * 3] = pos.x;
      imagePositions[i * 3 + 1] = pos.y;
      imagePositions[i * 3 + 2] = pos.z;
    }

    // 散らばり用のランダムな座標
    scatterPositions = new Float32Array(numParticles * 3);
    for (let i = 0; i < numParticles; i++) {
      scatterPositions[i * 3] = (Math.random() - 0.5) * CONFIG.INITIAL_RANDOM_RANGE_X;
      scatterPositions[i * 3 + 1] = (Math.random() - 0.5) * CONFIG.INITIAL_RANDOM_RANGE_Y;
      scatterPositions[i * 3 + 2] = (Math.random() - 0.5) * CONFIG.INITIAL_RANDOM_RANGE_Z;
    }

    // 初期のパーティクル配置は散らばった状態(scatterPositions)
    currentPositions = new Float32Array(numParticles * 3);
    for (let i = 0; i < numParticles * 3; i++) {
      currentPositions[i] = scatterPositions[i];
    }

    // 各パーティクルの色情報
    colors = new Float32Array(numParticles * 3);
    for (let i = 0; i < numParticles; i++) {
      const col = colorsArr[i];
      colors[i * 3] = col.r;
      colors[i * 3 + 1] = col.g;
      colors[i * 3 + 2] = col.b;
    }

    // パーティクルのジオメトリ・マテリアルを作成(既に存在していれば差し替え)
    if (currentPoints) {
      scene.remove(currentPoints);
      currentGeometry.dispose();
    }
    currentGeometry = new THREE.BufferGeometry();
    currentGeometry.setAttribute('position', new THREE.BufferAttribute(currentPositions, 3));
    currentGeometry.setAttribute('color', new THREE.BufferAttribute(colors, 3));

    const material = new THREE.PointsMaterial({
      size: CONFIG.PARTICLE_SIZE,
      vertexColors: true,
    });

    currentPoints = new THREE.Points(currentGeometry, material);
    scene.add(currentPoints);

    // 状態初期化:今は「集まる」状態にする(ターゲット=画像の形状)
    currentTarget = imagePositions;
    isGathering = true;
    lastSwitchTime = Date.now();
  };
}

/*========================================
  アニメーションループ
========================================*/
function animate() {
  requestAnimationFrame(animate);

  if (!currentPoints) return;

  // 各パーティクルの座標を currentTarget に向けて補間移動
  for (let i = 0; i < numParticles; i++) {
    const ix = i * 3;
    currentPositions[ix] += (currentTarget[ix] - currentPositions[ix]) * CONFIG.LERP_FACTOR;
    currentPositions[ix + 1] += (currentTarget[ix + 1] - currentPositions[ix + 1]) * CONFIG.LERP_FACTOR;
    currentPositions[ix + 2] += (currentTarget[ix + 2] - currentPositions[ix + 2]) * CONFIG.LERP_FACTOR;
  }
  (currentGeometry.getAttribute('position') as THREE.BufferAttribute).needsUpdate = true;

  // 各パーティクルがターゲットに近づいたかを判定
  let maxDiff = 0;
  for (let i = 0; i < numParticles; i++) {
    const ix = i * 3;
    const dx = currentPositions[ix] - currentTarget[ix];
    const dy = currentPositions[ix + 1] - currentTarget[ix + 1];
    const dz = currentPositions[ix + 2] - currentTarget[ix + 2];
    const diff = Math.sqrt(dx * dx + dy * dy + dz * dz);
    if (diff > maxDiff) {
      maxDiff = diff;
    }
  }

  // すべてのパーティクルがターゲットに近づいていて、待機時間を過ぎていれば
  if (maxDiff < CONFIG.TRANSITION_THRESHOLD && (Date.now() - lastSwitchTime > CONFIG.STATE_DELAY)) {
    if (isGathering) {
      // 現在が「集まる」状態なら、ここで「散らばる」状態へ切り替え
      currentTarget = scatterPositions;
      isGathering = false;
      lastSwitchTime = Date.now();
    } else {
      // 散らばった状態になったら、次の画像へ切り替え
      currentImageIndex = (currentImageIndex + 1) % IMAGE_SOURCES.length;
      loadImage(currentImageIndex);
    }
  }

  renderer.render(scene, camera);
}

/*========================================
  初回の画像読み込みとアニメーション開始
========================================*/
loadImage(currentImageIndex);
animate();

/*========================================
  リサイズ対応
========================================*/
window.addEventListener('resize', () => {
  camera.aspect = window.innerWidth / window.innerHeight;
  camera.updateProjectionMatrix();
  renderer.setSize(window.innerWidth, window.innerHeight);
});
画像はイイ感じに切り替わりましたが、パーティクルが多いと集まった後も書くパーティクルが静止せず気持ちが悪いので、もう少し修正します。
また、パラメーターの初期値を以下のように変更してください
import * as THREE from 'three';

/*========================================
  設定パラメーター(必要に応じて値を変更してください)
========================================*/
const CONFIG = {
  // カメラ設定
  CAMERA_FOV: 75,
  CAMERA_NEAR: 0.1,
  CAMERA_FAR: 1000,
  CAMERA_Z: 200,

  // パーティクル設定
  PARTICLE_SIZE: 2,              // パーティクルのサイズ
  SAMPLE_STEP: 3,                // 画像からサンプリングする間隔(小さいほど粒子数が増えます)
  LERP_FACTOR: 0.05,             // 補間係数(大きいほど速く移動)
  INITIAL_RANDOM_RANGE_X: window.innerWidth,  // 散らばる際のX方向の広がり
  INITIAL_RANDOM_RANGE_Y: window.innerHeight, // 散らばる際のY方向の広がり
  INITIAL_RANDOM_RANGE_Z: 200,    // 散らばる際のZ方向の広がり

  // 画像関連
  IMAGE_SCALE_FACTOR: 0.25,       // 画像のピクセル座標に掛ける倍率
  ALPHA_THRESHOLD: 128,           // 画像のアルファ値の閾値(この値以上のピクセルをパーティクル化)

  // 状態切り替え設定
  TRANSITION_THRESHOLD: 1,       // すべてのパーティクルが目標に近いと判断する閾値(各頂点の誤差)
  STATE_DELAY: 5000,             // 状態切り替えまでの待機時間(ミリ秒)
};

// 切り替える画像のパス(publicフォルダ内に配置してください)
const IMAGE_SOURCES = ['/image1.png', '/image2.png', '/image3.png'];
let currentImageIndex = 0;

/*========================================
  シーン、カメラ、レンダラーの初期化
========================================*/
const scene = new THREE.Scene();

const camera = new THREE.PerspectiveCamera(
  CONFIG.CAMERA_FOV,
  window.innerWidth / window.innerHeight,
  CONFIG.CAMERA_NEAR,
  CONFIG.CAMERA_FAR
);
camera.position.z = CONFIG.CAMERA_Z;

const renderer = new THREE.WebGLRenderer({ antialias: true });
renderer.setSize(window.innerWidth, window.innerHeight);
document.body.appendChild(renderer.domElement);

/*========================================
  グローバル変数(各画像ごとに再初期化される)
========================================*/
let currentGeometry: THREE.BufferGeometry;
let currentPoints: THREE.Points;
let currentPositions: Float32Array;
let currentTarget: Float32Array;
let scatterPositions: Float32Array;
let imagePositions: Float32Array;
let colors: Float32Array;
let numParticles = 0;

let isGathering = true;  // true: 画像の形に集まる状態、false: 散らばる状態
let lastSwitchTime = Date.now();

/*========================================
  画像を読み込み、パーティクルデータを生成する関数
========================================*/
function loadImage(index: number) {
  const img = new Image();
  img.src = IMAGE_SOURCES[index];
  img.onload = () => {
    // オフスクリーンキャンバスに描画してピクセル情報を取得
    const canvas = document.createElement('canvas');
    const ctx = canvas.getContext('2d');
    if (!ctx) return;
    canvas.width = img.width;
    canvas.height = img.height;
    ctx.drawImage(img, 0, 0);
    const imgData = ctx.getImageData(0, 0, img.width, img.height);
    const data = imgData.data;

    // 画像から対象とするピクセルの座標と色情報を抽出
    const positionsArr: THREE.Vector3[] = [];
    const colorsArr: THREE.Color[] = [];
    for (let y = 0; y < img.height; y += CONFIG.SAMPLE_STEP) {
      for (let x = 0; x < img.width; x += CONFIG.SAMPLE_STEP) {
        const idx = (x + y * img.width) * 4;
        const alpha = data[idx + 3];
        if (alpha > CONFIG.ALPHA_THRESHOLD) {
          // 画像の中心を原点に合わせた座標に変換
          const posX = x - img.width / 2;
          const posY = img.height / 2 - y; // Y軸は反転
          positionsArr.push(new THREE.Vector3(posX, posY, 0));

          // RGB値を0~1に正規化
          const r = data[idx] / 255;
          const g = data[idx + 1] / 255;
          const b = data[idx + 2] / 255;
          colorsArr.push(new THREE.Color(r, g, b));
        }
      }
    }

    // 画像のピクセル座標にスケーリングを適用
    const imageScale = Math.min(window.innerWidth / img.width, window.innerHeight / img.height) * CONFIG.IMAGE_SCALE_FACTOR;
    positionsArr.forEach(pos => pos.multiplyScalar(imageScale));

    numParticles = positionsArr.length;
    // 画像の形状となるターゲット座標
    imagePositions = new Float32Array(numParticles * 3);
    for (let i = 0; i < numParticles; i++) {
      const pos = positionsArr[i];
      imagePositions[i * 3] = pos.x;
      imagePositions[i * 3 + 1] = pos.y;
      imagePositions[i * 3 + 2] = pos.z;
    }

    // 散らばり用のランダムな座標
    scatterPositions = new Float32Array(numParticles * 3);
    for (let i = 0; i < numParticles; i++) {
      scatterPositions[i * 3] = (Math.random() - 0.5) * CONFIG.INITIAL_RANDOM_RANGE_X;
      scatterPositions[i * 3 + 1] = (Math.random() - 0.5) * CONFIG.INITIAL_RANDOM_RANGE_Y;
      scatterPositions[i * 3 + 2] = (Math.random() - 0.5) * CONFIG.INITIAL_RANDOM_RANGE_Z;
    }

    // 初期のパーティクル配置は散らばった状態(scatterPositions)
    currentPositions = new Float32Array(numParticles * 3);
    for (let i = 0; i < numParticles * 3; i++) {
      currentPositions[i] = scatterPositions[i];
    }

    // 各パーティクルの色情報
    colors = new Float32Array(numParticles * 3);
    for (let i = 0; i < numParticles; i++) {
      const col = colorsArr[i];
      colors[i * 3] = col.r;
      colors[i * 3 + 1] = col.g;
      colors[i * 3 + 2] = col.b;
    }

    // パーティクルのジオメトリ・マテリアルを作成(既に存在していれば差し替え)
    if (currentPoints) {
      scene.remove(currentPoints);
      currentGeometry.dispose();
    }
    currentGeometry = new THREE.BufferGeometry();
    currentGeometry.setAttribute('position', new THREE.BufferAttribute(currentPositions, 3));
    currentGeometry.setAttribute('color', new THREE.BufferAttribute(colors, 3));

    const material = new THREE.PointsMaterial({
      size: CONFIG.PARTICLE_SIZE,
      vertexColors: true,
    });

    currentPoints = new THREE.Points(currentGeometry, material);
    scene.add(currentPoints);

    // 状態初期化:今は「集まる」状態にする(ターゲット=画像の形状)
    currentTarget = imagePositions;
    isGathering = true;
    lastSwitchTime = Date.now();
  };
}

/*========================================
  アニメーションループ
========================================*/
function animate() {
  requestAnimationFrame(animate);
  if (!currentPoints) return;

  // 各パーティクルの位置を currentTarget に向けて補間移動
  for (let i = 0; i < numParticles; i++) {
    const ix = i * 3;
    // 現在の差分が十分大きい場合は LERP で更新
    const dx = currentTarget[ix] - currentPositions[ix];
    const dy = currentTarget[ix + 1] - currentPositions[ix + 1];
    const dz = currentTarget[ix + 2] - currentPositions[ix + 2];
    const dist = Math.sqrt(dx * dx + dy * dy + dz * dz);
    if (dist > CONFIG.TRANSITION_THRESHOLD) {
      currentPositions[ix] += dx * CONFIG.LERP_FACTOR;
      currentPositions[ix + 1] += dy * CONFIG.LERP_FACTOR;
      currentPositions[ix + 2] += dz * CONFIG.LERP_FACTOR;
    } else {
      // 目標との誤差が十分小さい場合はターゲット座標に固定
      currentPositions[ix] = currentTarget[ix];
      currentPositions[ix + 1] = currentTarget[ix + 1];
      currentPositions[ix + 2] = currentTarget[ix + 2];
    }
  }
  (currentGeometry.getAttribute('position') as THREE.BufferAttribute).needsUpdate = true;

  // すべてのパーティクルがターゲットに近いか確認
  let maxDiff = 0;
  for (let i = 0; i < numParticles; i++) {
    const ix = i * 3;
    const dx = currentPositions[ix] - currentTarget[ix];
    const dy = currentPositions[ix + 1] - currentTarget[ix + 1];
    const dz = currentPositions[ix + 2] - currentTarget[ix + 2];
    const diff = Math.sqrt(dx * dx + dy * dy + dz * dz);
    if (diff > maxDiff) {
      maxDiff = diff;
    }
  }

  // ターゲットにほぼ一致していて、指定待機時間が経過していれば状態切替
  if (maxDiff < CONFIG.TRANSITION_THRESHOLD && Date.now() - lastSwitchTime > CONFIG.STATE_DELAY) {
    if (isGathering) {
      // 集まっている状態なら散らばる状態へ切替
      currentTarget = scatterPositions;
      isGathering = false;
      lastSwitchTime = Date.now();
    } else {
      // 散らばった状態なら次の画像を読み込み
      currentImageIndex = (currentImageIndex + 1) % IMAGE_SOURCES.length;
      loadImage(currentImageIndex);
    }
  }

  renderer.render(scene, camera);
}

/*========================================
  初回の画像読み込みとアニメーション開始
========================================*/
loadImage(currentImageIndex);
animate();

/*========================================
  リサイズ対応
========================================*/
window.addEventListener('resize', () => {
  camera.aspect = window.innerWidth / window.innerHeight;
  camera.updateProjectionMatrix();
  renderer.setSize(window.innerWidth, window.innerHeight);
});
イイ感じに動きました。
最後の微調整
最後に、パーティクルが散らばり過ぎていたり、大きすぎたり、また形を作る場所を適宜変更できるようにしたいので、これらを修正します。
・パーティクルは画面全体に散らばるのではなく、ある範囲内でドーナツ型に散らばるようにしてください
・散らばったときのパーティクルのサイズをかなり小さくして、粒子のようにしてください。
・パーティクルのサイズをアニメーションに合わせて徐々に変えるようにしてください
・パーティクルが集まる座標もパラメーターで表示指定できるようにしてください。
・集まる座標は中心を設定するようにしてください。また、パーティクルが散らばる範囲もこの座標に合わせて設定してください。初期値をウィンドウの右側で縦方向は中央になるようにしてください
最終的なコードはこのようになります。
import * as THREE from 'three';

/*========================================
  設定パラメーター(必要に応じて調整してください)
========================================*/
const CONFIG = {
  // カメラ設定
  CAMERA_FOV: 75,
  CAMERA_NEAR: 0.1,
  CAMERA_FAR: 1000,
  CAMERA_Z: 200,

  // パーティクル設定
  PARTICLE_SIZE_GATHERED: 2,     // 集まる状態でのパーティクルサイズ
  PARTICLE_SIZE_SCATTERED: 0.2,  // 散らばる状態でのパーティクルサイズ(かなり小さく)
  SAMPLE_STEP: 3,              // 画像からサンプリングする間隔(小さいほど粒子数が増えます)
  LERP_FACTOR: 0.05,           // 位置やサイズの補間係数

  // 画像関連
  IMAGE_SCALE_FACTOR: 0.25,    // 画像のピクセル座標に掛ける倍率
  ALPHA_THRESHOLD: 128,        // 画像のアルファ値の閾値

  // 集まる状態の基準座標(画像から抽出したパーティクル位置に加えるオフセット)
  GATHER_CENTER: { x: 100, y: 0, z: 0 },

  // 散らばる状態の中心(この座標を中心としてドーナツ型に散らばる)
  SCATTER_OFFSET: { x: 100, y: 0, z: 0 },
  // ドーナツ型の大きな半径(ドーナツ全体の大きさ)
  SCATTER_RADIUS: 50,
  // ドーナツの管の半径(中心部は空になる)
  SCATTER_MINOR_RADIUS: 20,

  // 浮遊アニメーションで加える y 軸方向の振幅
  FLOAT_AMPLITUDE: 10,

  // 状態切り替え設定
  TRANSITION_THRESHOLD: 1,     // すべてのパーティクルが目標に近いと判断する閾値(集まる状態の場合)
  STATE_DELAY: 5000,           // 状態切り替えまでの待機時間(ミリ秒)
};

// 切り替える画像のパス(public フォルダ内に配置してください)
const IMAGE_SOURCES = ['/image1.png', '/image2.png', '/image3.png'];
let currentImageIndex = 0;

/*========================================
  シーン、カメラ、レンダラーの初期化
========================================*/
const scene = new THREE.Scene();

const camera = new THREE.PerspectiveCamera(
  CONFIG.CAMERA_FOV,
  window.innerWidth / window.innerHeight,
  CONFIG.CAMERA_NEAR,
  CONFIG.CAMERA_FAR
);
camera.position.z = CONFIG.CAMERA_Z;

const renderer = new THREE.WebGLRenderer({ antialias: true });
renderer.setSize(window.innerWidth, window.innerHeight);
document.body.appendChild(renderer.domElement);

/*========================================
  グローバル変数(各画像ごとに再初期化される)
========================================*/
let currentGeometry: THREE.BufferGeometry;
let currentPoints: THREE.Points;
let currentPositions: Float32Array;
let currentTarget: Float32Array;
let scatterPositions: Float32Array;
let imagePositions: Float32Array;
let colors: Float32Array;
let numParticles = 0;

let isGathering = true;  // true: 集まる状態、false: 散らばる状態
let lastSwitchTime = Date.now();

// パーティクルサイズの現在値と目標値
let currentParticleSize = CONFIG.PARTICLE_SIZE_GATHERED;
let targetParticleSize = CONFIG.PARTICLE_SIZE_GATHERED;

// 各パーティクルごとの浮遊用位相(散らばる状態で使用)
let floatPhases: number[] = [];

/*========================================
  画像読み込み・パーティクルデータ生成関数
========================================*/
function loadImage(index: number) {
  const img = new Image();
  img.src = IMAGE_SOURCES[index];
  img.onload = () => {
    const canvas = document.createElement('canvas');
    const ctx = canvas.getContext('2d');
    if (!ctx) return;
    canvas.width = img.width;
    canvas.height = img.height;
    ctx.drawImage(img, 0, 0);
    const imgData = ctx.getImageData(0, 0, img.width, img.height);
    const data = imgData.data;

    const positionsArr: THREE.Vector3[] = [];
    const colorsArr: THREE.Color[] = [];
    for (let y = 0; y < img.height; y += CONFIG.SAMPLE_STEP) {
      for (let x = 0; x < img.width; x += CONFIG.SAMPLE_STEP) {
        const idx = (x + y * img.width) * 4;
        const alpha = data[idx + 3];
        if (alpha > CONFIG.ALPHA_THRESHOLD) {
          const posX = x - img.width / 2;
          const posY = img.height / 2 - y; // y 軸は反転
          positionsArr.push(new THREE.Vector3(posX, posY, 0));
          const r = data[idx] / 255;
          const g = data[idx + 1] / 255;
          const b = data[idx + 2] / 255;
          colorsArr.push(new THREE.Color(r, g, b));
        }
      }
    }

    // 画像の座標にスケーリングを適用
    const imageScale = Math.min(window.innerWidth / img.width, window.innerHeight / img.height) * CONFIG.IMAGE_SCALE_FACTOR;
    positionsArr.forEach(pos => pos.multiplyScalar(imageScale));

    numParticles = positionsArr.length;
    // 集まる状態のターゲット座標は、各座標に GATHER_CENTER を加えたもの
    imagePositions = new Float32Array(numParticles * 3);
    for (let i = 0; i < numParticles; i++) {
      const pos = positionsArr[i];
      imagePositions[i * 3]     = pos.x + CONFIG.GATHER_CENTER.x;
      imagePositions[i * 3 + 1] = pos.y + CONFIG.GATHER_CENTER.y;
      imagePositions[i * 3 + 2] = pos.z + CONFIG.GATHER_CENTER.z;
    }

    // 散らばる状態の座標を、SCATTER_OFFSET を中心とするドーナツ型に配置
    // ドーナツ型(トーラス)のパラメータとして、major radius = SCATTER_RADIUS, minor radius = SCATTER_MINOR_RADIUS
    scatterPositions = new Float32Array(numParticles * 3);
    floatPhases = [];
    for (let i = 0; i < numParticles; i++) {
      const theta = 2 * Math.PI * Math.random();  // 大円周上の角度
      const phi = 2 * Math.PI * Math.random();      // 管内の角度
      // minor radius を均一に分布させるために sqrt を掛ける
      const r = CONFIG.SCATTER_MINOR_RADIUS * Math.sqrt(Math.random());
      const x = (CONFIG.SCATTER_RADIUS + r * Math.cos(phi)) * Math.cos(theta);
      const y = (CONFIG.SCATTER_RADIUS + r * Math.cos(phi)) * Math.sin(theta);
      const z = r * Math.sin(phi);
      scatterPositions[i * 3]     = CONFIG.SCATTER_OFFSET.x + x;
      scatterPositions[i * 3 + 1] = CONFIG.SCATTER_OFFSET.y + y;
      scatterPositions[i * 3 + 2] = CONFIG.SCATTER_OFFSET.z + z;
      floatPhases.push(Math.random() * 2 * Math.PI);
    }

    // 初期のパーティクル配置は散らばった状態(scatterPositions)
    currentPositions = new Float32Array(numParticles * 3);
    for (let i = 0; i < numParticles * 3; i++) {
      currentPositions[i] = scatterPositions[i];
    }

    // 各パーティクルの色情報
    colors = new Float32Array(numParticles * 3);
    for (let i = 0; i < numParticles; i++) {
      const col = colorsArr[i];
      colors[i * 3]     = col.r;
      colors[i * 3 + 1] = col.g;
      colors[i * 3 + 2] = col.b;
    }

    if (currentPoints) {
      scene.remove(currentPoints);
      currentGeometry.dispose();
    }
    currentGeometry = new THREE.BufferGeometry();
    currentGeometry.setAttribute('position', new THREE.BufferAttribute(currentPositions, 3));
    currentGeometry.setAttribute('color', new THREE.BufferAttribute(colors, 3));

    // 初期は「集まる」状態なので、パーティクルサイズは大きめに設定
    currentParticleSize = CONFIG.PARTICLE_SIZE_GATHERED;
    targetParticleSize = CONFIG.PARTICLE_SIZE_GATHERED;
    const material = new THREE.PointsMaterial({
      size: currentParticleSize,
      vertexColors: true,
    });
    currentPoints = new THREE.Points(currentGeometry, material);
    scene.add(currentPoints);

    // 集まる状態にするため、currentTarget は imagePositions のクローンにする
    currentTarget = new Float32Array(imagePositions);
    isGathering = true;
    lastSwitchTime = Date.now();
  };
}

/*========================================
  アニメーションループ
========================================*/
function animate() {
  requestAnimationFrame(animate);
  if (!currentPoints) return;

  // 各パーティクルの位置を currentTarget に向けて線形補間で更新
  for (let i = 0; i < numParticles; i++) {
    const ix = i * 3;
    const dx = currentTarget[ix] - currentPositions[ix];
    const dy = currentTarget[ix + 1] - currentPositions[ix + 1];
    const dz = currentTarget[ix + 2] - currentPositions[ix + 2];
    const dist = Math.sqrt(dx * dx + dy * dy + dz * dz);
    if (dist > CONFIG.TRANSITION_THRESHOLD) {
      currentPositions[ix]     += dx * CONFIG.LERP_FACTOR;
      currentPositions[ix + 1] += dy * CONFIG.LERP_FACTOR;
      currentPositions[ix + 2] += dz * CONFIG.LERP_FACTOR;
    } else {
      currentPositions[ix]     = currentTarget[ix];
      currentPositions[ix + 1] = currentTarget[ix + 1];
      currentPositions[ix + 2] = currentTarget[ix + 2];
    }
  }
  (currentGeometry.getAttribute('position') as THREE.BufferAttribute).needsUpdate = true;

  // パーティクルサイズも徐々に targetParticleSize に補間更新
  currentParticleSize += (targetParticleSize - currentParticleSize) * CONFIG.LERP_FACTOR;
  (currentPoints.material as THREE.PointsMaterial).size = currentParticleSize;

  // 状態に応じた currentTarget の更新
  if (isGathering) {
    // 集まる状態:目標は imagePositions(固定)
    let maxDiff = 0;
    for (let i = 0; i < numParticles; i++) {
      const ix = i * 3;
      const dx = currentPositions[ix] - currentTarget[ix];
      const dy = currentPositions[ix + 1] - currentTarget[ix + 1];
      const dz = currentPositions[ix + 2] - currentTarget[ix + 2];
      const diff = Math.sqrt(dx * dx + dy * dy + dz * dz);
      if (diff > maxDiff) maxDiff = diff;
    }
    if (maxDiff < CONFIG.TRANSITION_THRESHOLD && Date.now() - lastSwitchTime > CONFIG.STATE_DELAY) {
      // 集まる状態から散らばる状態へ切替:目標を scatterPositions(後は浮遊オシレーション付き)に変更
      currentTarget = new Float32Array(scatterPositions);
      isGathering = false;
      lastSwitchTime = Date.now();
      targetParticleSize = CONFIG.PARTICLE_SIZE_SCATTERED;
    }
  } else {
    // 散らばる状態:各フレーム、currentTarget に浮遊オシレーションを加えた値を更新
    const t = Date.now() * 0.001;
    for (let i = 0; i < numParticles; i++) {
      const ix = i * 3;
      currentTarget[ix]     = scatterPositions[ix];
      currentTarget[ix + 1] = scatterPositions[ix + 1] + Math.sin(t + floatPhases[i]) * CONFIG.FLOAT_AMPLITUDE;
      currentTarget[ix + 2] = scatterPositions[ix + 2];
    }
    if (Date.now() - lastSwitchTime > CONFIG.STATE_DELAY) {
      currentImageIndex = (currentImageIndex + 1) % IMAGE_SOURCES.length;
      loadImage(currentImageIndex);
    }
  }

  renderer.render(scene, camera);
}

/*========================================
  初回画像読み込みとアニメーション開始
========================================*/
loadImage(currentImageIndex);
animate();

/*========================================
  リサイズ対応
========================================*/
window.addEventListener('resize', () => {
  camera.aspect = window.innerWidth / window.innerHeight;
  camera.updateProjectionMatrix();
  renderer.setSize(window.innerWidth, window.innerHeight);
});
最後にhtmlでテキストをつけて、cssでスタイリングしてトップビューの完成です。
デザイナーでも作れるのがすごい
ChatGPTだけでこれだけのアニメーションが作れてしまうのがすごいですね。コードが書けないデザイナーでも構築ができてしまうほどなので、実際に動かしてクライアントに見せて提案ということもできたり、テンプレートを作って少し改良するという方法もできそうですね。
これからも取り入れてみたいと思います。
スポンサードサーチ
人気記事英語学習用SNSをLaravelで作ってみた【システム解説あり】